Today we will learn how to create an iPhone 3GS in Photo Filtre Studio. We will use some basic drawing tools and layer effects to make it as realistic as possible. We will concentrate on the camera interface in this tutorial....
 Welcome to another free Photo Filtre tutorial, today we are going to create an GIF Image using text. I’ll be explaining in detail on how I used Photo Filtre’s tools to achieve the final effect, also I will add some extra tips on how you can make your work stand out and look more special (On Video)...
 I hope you like this brushes
If you have any doubt or problem, write a comment and i will help you.
or subscrib me and stay update with more new ...
I hope you like this brushes
If you have any doubt or problem, write a comment and i will help you.
or subscrib me and stay update with more new ...
 This article besides having the step by step tutorial I created a video tutorial for you, because it does not always promise a lot of work,
but I did create the tutorial in video and pictures it's take a time....
This article besides having the step by step tutorial I created a video tutorial for you, because it does not always promise a lot of work,
but I did create the tutorial in video and pictures it's take a time....


 Today we will learn how to create an iPhone 3GS in Photo Filtre Studio. We will use some basic drawing tools and layer effects to make it as realistic as possible. We will concentrate on the camera interface in this tutorial. The techniques demonstrated here can help you to recreate any device, like flat screen TV’s, laptops etc. hope you have fun with it. Let’s get started!
Skill Level
Intermediate
Preparation:
First we will create a background. Open a new document with a White Background 376 x 733 Pixels and open another new document with 320x480 PixelsStep 1
We are going to work with the 320x480 Pixels background !this background is a virtual screen of IPhone, we will use to know how it will look the base
and when we finished we will replace it with a wallpaper of Apple IPhone.

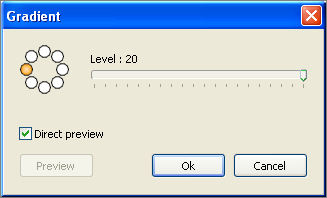
click on the Gradient icon.

Step 2
Now trace the IPhone base.
 This is how it will look like.
Now, we are going to draw the base using the Selection tool click on the shortcut (A) than go to Rounded Rectangle or with shortcut (C), select the base of the IPhone.
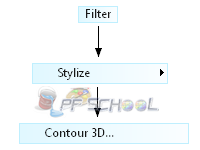
When you select the base, do these steps

Width to 5.
Opacity to 100.
Position to Top/Right or Top/Left don't matter because we will use it twice with 2 side.
When you finished click Ok !.
 Just change the position from Top/Right to Top/Left.
Than click Ok !.
Step 3
Drawing the Surface of the IPhone.
 Select Fill Tool paint the white area to black
 Now, click in the Magic Wand tool (shortcut (L)) and select the black area of the IPhone Base

When you select the Black area, follow these steps
 Just do like this picture, than click Ok !.
Step 4
Making the border look like a metallic.
 This is how it will look when you finished from these steps
First, Duplicate the background than clear it (make the background look whole white), when you done Duplicate the white background and make it between the IPhone Base to look like this picture.
See the Layer 2 is IPhone Base and Layer 3 is the one that we Duplicate it from the background, the next work is on the layer 3.
 Select the Layer 3 and go to Layer Manager Tool shortcut (W)
 Now, Merge between Layer 3 and Layer 2. This white layer and Overlay mode give to the border an metallic effect,
Step 5
In this step we are going to make reflective glare over the phone. Let's start.
 With the Magic Wand Tool select the black part of the Phone than copy it and past it, with this black part we will make the reflective glare over the phone. Remarque: (don't select the whole layer 2 with the border, just select the black part without the border)
Select the layer 3
than click on the Gradient icon. You can change these specifics as you like (only with opacity, don't change the colors make them all with white), here I make Color 1 white with Opacity 15% and Color 2 with Opacity 25%, you can change it as you want. When you finished just click Ok !.
 Here go to the Selection Tool (shortcut (A or J)) than choose the Polygon (shortcut (J)).
  With Polygon make a selection just like this picture and press Delete in your keyboard or right click than Clear.
 Now, go to Layer manager tool and reduce the opacity from 100% to 80%
Step 6
Now we will create the speaker at the top of the IPhone.
 Make a selection of the rounded rectangle and press Delete or right click and go to Clear. Remarque: just clear the rectangle area from the Layer 2
 Now, just reduce the size of the rounded rectangle with 2 pixels. look at the picture.
 When you done, go to Gradient and change it to these settings than click Ok.
Step 7
Now we will create the camera,
 Use the Ellipse Tool and draw a circle than go to Gradient and change the colors and opacity just like this picture and click Ok.
 Now, reduce the size of the circle and go to Edit than search for Stroke and Fill or you can use the shortcut (Ctrl + B), choose the color Black and Width 1 than click Ok,
 Step 8
Now create the home bottom.
 Use the Ellipse Tool and draw a circle.
Go to Gradient and do like these settings,
Direction: Right.
Color 1: Black, Opacity 30%.
Color 2: White, Opacity 45%.
When you done click Ok.
 Now, Make a selection of the rounded rectangle, look at this picture and see how it will look like.
Go to Edit than search for Stroke and Fill or with the shortcut (Ctrl + B), change the color to Gray and Width to 1 than click Ok.
Step 8
Now create the IPhone screen.
 About the screen, I'm using a wallpaper for IPhone with 320x480 Pixels, you can find it in Google images.
Now, to open the wallpaper to the document go to Layer --> New --> Open as layer than choose the wallpaper.
Make Layer 1 under the wallpaper.
Select the wallpaper (Layer4) and click (Ctrl + B) and change the color to black like a gray than width to 2, click Ok.
Final Step
Now It's done just merge all layers with the shortcut (Shift + Enter) and save the picture
Optional
 Now it’s time to add in your favorite iPhone wallpaper. Have fun there! Click here to view the final image.
See this tutorial in video HD: