
 Today we will learn how to create an iPhone 3GS in Photo Filtre Studio. We will use some basic drawing tools and layer effects to make it as realistic as possible. We will concentrate on the camera interface in this tutorial....
 Welcome to another free Photo Filtre tutorial, today we are going to create an GIF Image using text. I’ll be explaining in detail on how I used Photo Filtre’s tools to achieve the final effect, also I will add some extra tips on how you can make your work stand out and look more special (On Video)...
 I hope you like this brushes
If you have any doubt or problem, write a comment and i will help you.
or subscrib me and stay update with more new ...
I hope you like this brushes
If you have any doubt or problem, write a comment and i will help you.
or subscrib me and stay update with more new ...
 This article besides having the step by step tutorial I created a video tutorial for you, because it does not always promise a lot of work,
but I did create the tutorial in video and pictures it's take a time....
This article besides having the step by step tutorial I created a video tutorial for you, because it does not always promise a lot of work,
but I did create the tutorial in video and pictures it's take a time....


Hi guys and welcome to a new tutorial of pfs school!. Some of you didn't know how to add / installing Textures, so this tutorial will teach you how to add it and use it. Let' start for this tutorial.
Part 1: how to add / installing Textures
 First, download this Texture in your desktop and copy it
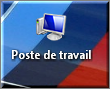
Than, go to your computer
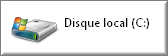
go to program files and Scroll down
to where you see Photo Filtre Studio X

open the Photo Filtre folder
and you will se the brushes folder
The part one is done, we ended up adding Textures.
Part 2: how to use brushes
Part 1:

First, save this picture in your desktop because we need to work on it.

First, open the shortcut
of Photo Filtre Studio X
After, open the previous picture (Messi picture)

Secondly, go to Filter and scroll down
to where you see Texture and click to Other...

you can enlarge the textures from moving right the scale.
When you finish changing the settings, click on Ok
 Congratulation!, this is the effect of the Texture
This is the Part one of the Tutorial
Part 2:
First, open the shortcutof Photo Filtre Studio X
After, open the previous picture (Messi picture) Secondly, go to Layer and scroll down
Open as Layer... Than choose the Texture
that you have save it in the Textures folder
 Here! click on the layer that you have add it and
go to Blend mode and choose Overly mode
 Congratulation! this is the effect of the Texture with Overly mode .
There is a difference between the result of part 1 and part 2
Like every tutorial there is a exemple for any tutorial.
This example, which I conducted with some changes
This example, which I conducted with some changes
Here i use some 4 Brushes and 3 Textures
with some changing of settings in blend mode
That’s all guys, I hope you find it useful
If you have any doubt or problem, write a comment and i will help you.


0 comments:
Enregistrer un commentaire